Beginners Guide to Using Chef with Amazon EC2
First Steps
Installing Chef
Follow Opscode’s Guide to installing Chef and its dependencies. In a nutshell, you’ll want:
- Git (not 100% necessary, but it helps)
- XCode (for libraries that Ruby uses on Mac)
- Ruby
- Rubygems
Read through the first and second pages to help you install the dependencies and the actual Chef gems. Skip over “You should set up your User and Organization” until after you’ve installed all the bits.
Once you’ve gone through the install process, check that the Chef gem is actually installed:
$ gem list chef
chef (0.10.4)
Hosted Chef Account
Now you need to set up your organisation’s account with Hosted Chef. Hosted Chef stores your configuration data which your machines “pull” to configure themselves with.
Follow the “You should set up your User and Organization” section of Opscode’s guide and keep the files you download in a safe place.
Pick the free plan for now; you can upgrade later or run your own Chef Server.
If you haven’t done so already, follow the guide to install Xcode, Rubygems, Chef and Git.
Creating a Chef Repository
Your Chef Repository is where all your server configuration is stored. You should treat this as source code and check it in to your favourite SCM software. I use Git. As this walkthrough is just kicking the tyres of Chef, don’t worry about SCM for now.
Change to your favourite directory – we’ll use our user directory here – and do the following:
$ cd ~
$ git clone http://github.com/opscode/chef-repo.git
This clones an empty Chef Repository to your workstation and contains the basic folder structure necessary for Chef. If you’re familiar with Rails, its much like rails new.
Creating the .chef Directory
Chef’s command line tool, Knife, reads its configuration from .chef directories. I don’t know why, but you have to create this yourself:
$ mkdir -p ~/chef-repo/.chef
Copy the keys and knife configuration you downloaded earlier into this directory:
$ cp USERNAME.pem ~/chef-repo/.chef
$ cp ORGANIZATION-validator.pem ~/chef-repo/.chef
$ cp knife.rb ~/chef-repo/.chef/knife.rb
Replace USERNAME above with your Hosted Chef Username, and ORGANIZATION with the short-name you provided when you signed up.
From now on, whenever you are in the chef-repo directory, Knife will connect to Hosted Chef.
To check all this works so far, run knife client list in your chef-repo directory and you should see your ORGANISATION-validator in the results.
Cookbooks and Roles
Adding a Cookbook
So this is where my tutorial differs from the others I’ve found. Instead of trying to run before we can walk, we’re just going to get apache running so that we can hit our server from a web browser.
$ cd ~/chef-repo
$ knife cookbook site install apache2
This command uses knife to “install” the apache2 cookbook from the chef community cookbook website. Although we’ve downloaded the cookbook locally, we need to upload it to our Chef Server (Opscode Hosted Chef in this case).
$ knife cookbook upload apache2
Creating a Role
Roles allow you to group a set of cookbooks to create a template for a particular purpose. For example, you might want a LAMP role that configures a server as a LAMP stack. For this you’d make a role consisting of the apache, mysql and php cookbooks. You could then apply the LAMP role to any machines you want to run as a webserver, instead of including the individual cookbooks every time.
Roles are plain Ruby files, so
$ touch roles/webserver.rb
Here’s what I used to get the webserver role to use the apache cookbook
name "webserver"
description "Install and configure apache"
  run_list(
    "recipe[apache2]"
  )
  override_attributes(
    :authorization => {
      :sudo => {
        :users => ["ubuntu"],
        :passwordless => true
      }
    }
  )
Its likely that we want more than just apache when we’re setting up our webservers, so you can add more cookbooks in to the run_list section. For now though, just apache will do.
Uploading Roles to Hosted Chef
As the chef-client program on the node (in this case, your EC2 instance) “pulls” from the Chef Server you need to upload the new roles to Hosted Chef.
$ knife role from file roles/webserver.rb
$ rake roles
As we’re starting with a blank EC2 instance I also used the “base” role from the rails-getting-started tutorial.
Creating a New Amazon EC2 Instance
Knife includes some extra tools to configure EC2 instances. You’ll need to
$ gem install knife-ec2
and Ubuntu/Debian users will have to install some extra stuff apparently:
$ sudo apt-get install libxml2-dev libxslt-dev
Also gem install net-ssh-multi as you need it for knife to ssh to your instance.
Setting up EC2
Amazon Access Keys
You also need to add your Amazon Access Key ID and Secret Access Key to the knife configuration file located at chef-repo/.chef/knife.rb
Add the following to the end:
knife[:aws_access_key_id] = "replace with the Amazon Access Key ID"
knife[:aws_secret_access_key] = "replace with the Amazon Secret Access Key ID"
To get these details, go to your AWS account page and select security credentials from the list of options. Paste the Access Key ID and Secret Access Key in to knife.rb.
EC2 Security Groups
Add the HTTP and SSH rules to your default security group. If you’re not familiar with EC2, click the “default” security group and change to the inbound tab. Select “HTTP” from the dropdown and click add rule. Do the same for SSH and then click “Apply Rule Changes”. You should see the new options in the table on the right.
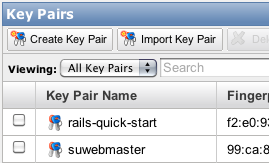
Create a Key Pair
Create a new Key Pair and save it in ~/.ssh.
You also need to change the permissions so that only you can read it.
$ sudo chmod 400 ~/.ssh/your-key.pem
Creating an EC2 Instance with Knife
You’re now ready to create an EC2 Instance with Knife.
$ knife ec2 server create -G default -I ami-00a59474 -f m1.small -i ~/.ssh/suwebmaster.pem -x ubuntu -r 'role[webserver]' --region eu-west-1 -Z eu-west-1a -S suwebmaster
Yep, there’s a lot going on here.
-G is the Amazon Security Group you want to use
-I is the AMI. You may need to find an alternative that’s available in your region. I used a Ubuntu Maverick instance
-f is the instance type. Not being an AWS veteran, I don’t really know what this is
-i is the key generated from the Amazon Key Pair
-x is the sudo user you want set up
-r is the roles you want to apply to the instance, in this case we want to use our webserver role
--region and -Z are region specific flags
-S is the name of your Amazon Key Pair
This will fail when it attempts to bootstrap as you need to give the bootstrap command the --sudo option, which apparently knife ec2 server create does not support. (Sometimes works, sometimes doesn’t!)
You’ll notice from the previous command that the output includes your instances public IP address. We’ll now manually bootstrap that address.
$ knife bootstrap xx.xxx.xx.xx -N i-ecddd09a -x ubuntu -r ' role[webserver]' -i ~/.ssh/suwebmaster.pem --sudo
The options are similar here; just insert your IP address and your instance name after the -N option.
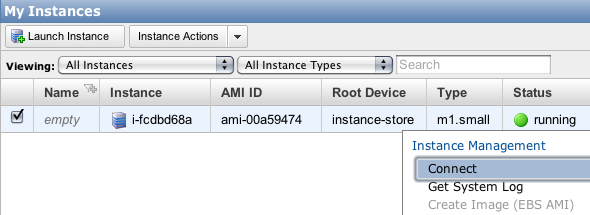
You should now get a load of output which will hopefully set up your instance. Once its finished, check your AWS Console to see the new instance.

Right click the instance and choose “Connect”. Use the instructions to SSH in to your new instance.
Now run sudo chef-client. This grabs your roles and cookbooks from Hosted Chef and applies them to the machine. You can set this up as a Cron job to run periodically if you want.
After this completes, check that /etc/apache2 exists.
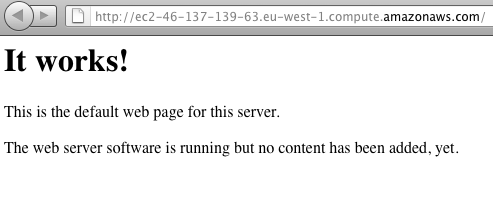
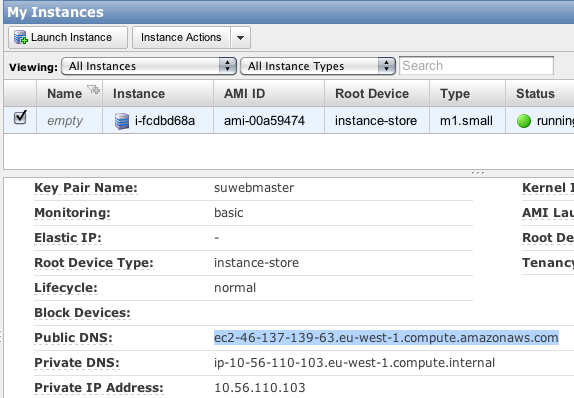
If it does, open up your browser and paste in the “Public DNS” address of your EC2 instance. You should see the default apache welcome page. Congratulations, we’re done!
It Works!